Suggestions On How To Fix Asus Motherboard BIOS Update Online
December 12, 2021
Recommended: Fortect
This article was created to help you when you get an error code while updating BIOS on an Asus motherboard.
1401Enter Advanced Mode of the BIOS Build Utility.Choose online.Press the left / right arrow to select a method for connecting to the Internet, and then press Enter.Follow the instructions on the screen to select the type of update.After completing the update process, reboot the system.140one
ASUS EZ Flash 3 allows you to download and update the latest BIOS over the Internet without the need for a bootable hard drive or any OS-based utilities.
1.This feature, ASUS EZ Flash 3, only applies to motherboards that already have EZ Flash 3 installed and the UEFI BIOS utility is displayed
Download the latest BIOS (or UEFI) from the manufacturer’s website.Extract it and its contents to a new USB drive.Restart your computer and enter BIOS / UEFI.Use the menu to edit BIOS / UEFI.
1. Switch to] [advanced mode in the BIOS build program. Go to the Tools menu, select ASUS EZ Flash Utility 3 and press Enter.
2. Insert your computer’s USB flash drive containing the latest BIOS file into the appropriate USB port.
5. Press the Point Up / Down keys to locate the USB drive that experts believe has the latest BIOS and press Enter.
7. Press the up / down arrow keys to understand the BIOS file and press Enter to complete the BIOS update process. After completing the update, restart the system.
This task can only support devices like almost any single-partition FAT 32/16 USB stick, but NOT
Perform special shutdown Resetting or resetting the model during BIOS update to reduce the risk of system boot failure!
1. Advanced mode of entering the BIOS setup program. Go to the Tools menu, select ASUS Flash ez Utility and press Enter.
3. Press the left / right arrow keys to select an Internet connection method, but press Enter.
Note. Please note that updating BIOS EZ Flash 3rd via PPPoE may no longer be supported on Intel Z390 and Z370 Charge Series platforms.
These two series are uniquely supported only by “DHCP” and “Static IP”.
Recommended: Fortect
Are you tired of your computer running slowly? Is it riddled with viruses and malware? Fear not, my friend, for Fortect is here to save the day! This powerful tool is designed to diagnose and repair all manner of Windows issues, while also boosting performance, optimizing memory, and keeping your PC running like new. So don't wait any longer - download Fortect today!

The firmware was flashed randomly, usually motherboards were locked. At least that was my experience with motherboards before UEFI in the lab. The widespread use of UEFI in modern motherboards means that usability has improved dramatically. In this context, flashing is unlikely to require a bootable CD with a loaded command line.
This short TV guide shows and shows how to install the firmware On every modern ASUS card (updated with BIOS). We used ASUS Crosshair V in this tutorial, but the path applies to all other cards with E-Z Flash. Please note that some modern PCB manufacturers (MSI and ASRock included separately) also allow BIOS flashing over Ethernet or wireless, although USB remains the simpler and more stable method.
Video Tutorial: Flashing BIOS With ASUS Large Card
Configuration And Required Tools
- Card with simplified firmware for firmware.
- Garden USB tool.
- The latest BIOS for the Personal Card that can be found on the Auto website. Register your USB device to it.
Warnings And Recommendations
A sudden power outage or even a power outage by the user can potentially jam the board – meaning willpower is just as useful as a certain brick when it comes to intrigue. Do not cut off the power supply frequently during the process. Don’t play spectacularly during a thunderstorm.
When updating via mostcards are installed locally, the old firmware is removed, and then the update is applied. In general, your board will not do this, instead it will need to reconnect to the Internet. It is recommended not to disconnect the cable during the update. We also recommend that you choose a wired connection.
After restarting the computer, some kind of EZ Flash interface will be automatically called to update the BIOS. After the update is complete, it will automatically restart. Enter the operating system, click AI Suite 3 again and open EZ Update to confirm the current BIOS setting information.
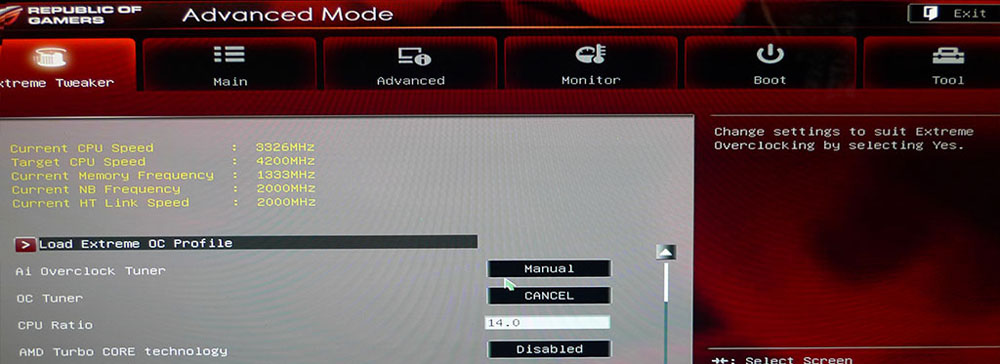
Also note that this Flash BIOS erases everything, so it is recommended that you write down all your overclocking settings before proceeding.
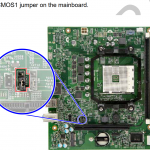
Please note that many expensive wood items such as MSI Z97-GD65 also offer “dual BIOS” feature. This is a solid thing. The reason writing firmware can cause the PCB to freeze is because consumers are unable to repair damaged IC firmware. To update the firmware, the board must first delete the existing blocks with the firmware and then apply the new trigger block by block to the flash device. Failure and sometimes power failure during the erase period can result in catastrophic failure or permanent damage to the primary flash memory.
Dual BIOS fixes this withimaging. If the BIOS fails due to bad flash memory, a physical switch available on the PCB can be flipped to positively activate the backup BIOS chip.
All users are now advised not to repair anything that is not injured, to paraphrase the saying. Updating the BIOS is recommended when new features (such as support for newer processors and unlocking or unlocking processors) are associated with features (often RAID). P>
Step-by-step Guide To Update BIOS On ASUS On Specific Motherboard
Click on the Tools page, then click ASUS EZ Flash 3 Utilities. Click on the new drive, USB flash drive that is stored in the BIOS instruction, and click on the BIOS file because you want to update it. Click YES. Confirm the BIOS information and click YES to start the update.
- Boot into BIOS. Go to Tool, then EZ Flash.
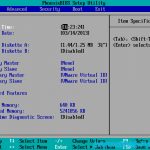
- Check the current BIOS version. Pay attention to
- Download several new BIOS versions from ASUS website. This is a USB storage device.
- Boot into BIOS. Go to Tool, then EZ Flash.
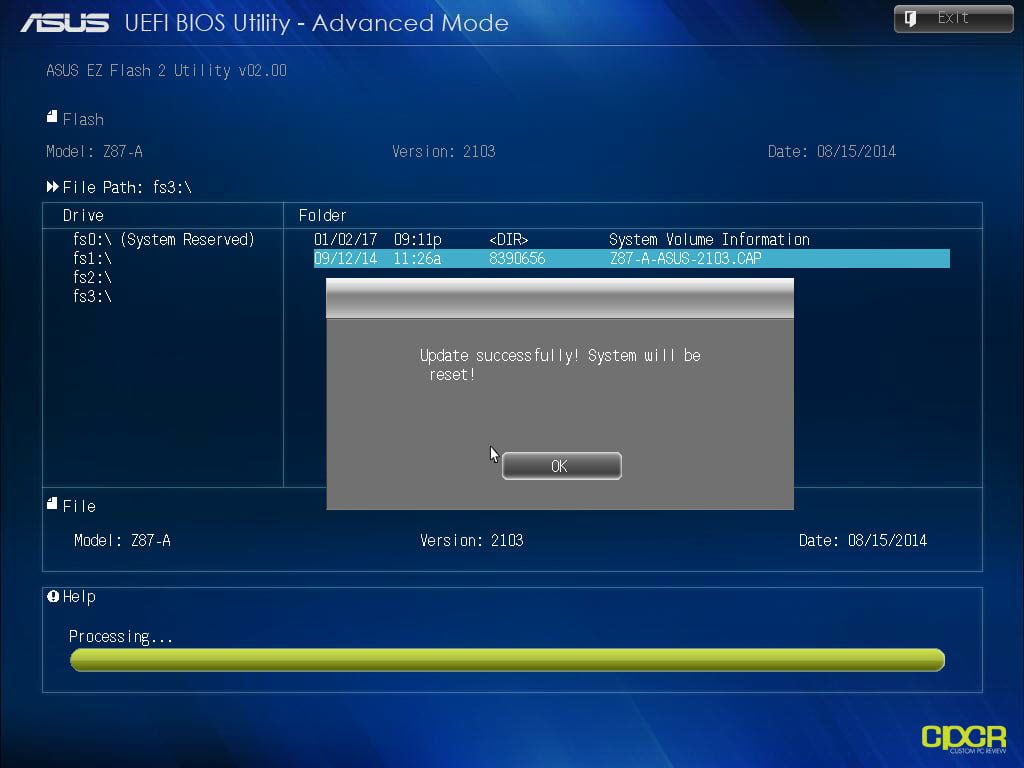
- Select USB system. Select a file. Hit Enter.
- Before applying the update, you will be prompted one last time. Mark this and accept.
- Reboot when finished.
- Recheck the BIOS plan to make sure it is updatedovulation is applied.
- You need to manually reapply the BIOS settings.
That’s all! You are done. We have similar content for internet production using MSI cards and therefore ASRock. Subscribe to YouTube channel for more and more lessons.
Download this software and fix your PC in minutes.Asus Moderkort Online Bios Uppdatering
Aktualizacja Biosu Plyty Glownej Asusa Online
Aggiornamento Del Bios Online Della Scheda Madre Asus
Actualizacion De La Bios En Linea De La Placa Base Asus
Asus Motherboard Online Bios Update
Mise A Jour Du Bios En Ligne De La Carte Mere Asus
Asus 마더보드 온라인 바이오스 업데이트
Atualizacao Online Do Bios Da Placa Mae Asus
Materinskaya Plata Asus Onlajn Obnovlenie Bios
Asus Moederbord Online Bios Update