Best Solution To Uninstall DirectX 10 For Windows 7
February 22, 2022
Recommended: Fortect
If you know how to uninstall DirectX 10 for Windows 7 on your system, this guide can help you. A more advanced strategy is to create a redundant array of independent drives, or RAID, which unfortunately turns your individual drives into one good cohesive team working together. If you have an ASUS motherboard, you may need to know the ASUS RAID configuration specifics.
Intel Matrix Storage Manager
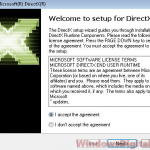
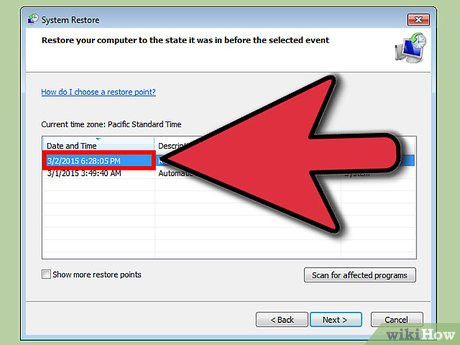
Perform a specific system restore. Open System Restore. Performing a System Restore was the easiest way to uninstall DirectX update because there is no official way to uninstall DirectX. Before deploying DirectX, you need a restore point, which is usually created during the entire installation process.
MegaRAID
Businesses can set up idle array of independent disks or RAID configurations to duplicate data to a running device, protecting against data failure and fully improving write performance. Some ASUS motherboards come with built-in software that allows administrators to create RAID arrays that you simply set up on your PC. Some RAID enabled cards have Intel Matrix Manager, Public Storage and others use MegaRAID.
Turn on or restart your asus computer. Press “Ctrl-I” on the splash screen.
Press 1 to select the Create Volume raid, then press Enter.
Create a fully qualified name for the new RAID system, then press Enter.
Use the up and down arrow keys to navigateoption pad to select “RAID0 (Striped)”, “RAID1 (Mirror)”, or “RAID10 (RAID0+1)”. Press Enter. Press “Enter” again.
Select the drive to add to the configuration and press the space bar.
Be sure to repeat the above step to add more drives, and then press Enter.
Use the navigation bar to select the line, if available, or use the default size. Press Enter.
Enter the actual size you want for the RAID project, or use the default maximum height. Press Enter. Press “Enter” again.
Press “Y” and then “Enter” to create the RAID volume.
Restart your computer to turn it on, then press “Ctrl-H” on the shoe screen.
“Custom
Select Configuration, and if so, click Next. Hold down the Ctrl key and select the drive you want to add the configuration to in the user panel on the left.
“I agree
Click Array. If so, click Next. Select “RAID0” or “RAID1” as the RAID level.
A
Select the configuration range level, if applicable, vs.Otherwise, use the default value.
Recommended: Fortect
Are you tired of your computer running slowly? Is it riddled with viruses and malware? Fear not, my friend, for Fortect is here to save the day! This powerful tool is designed to diagnose and repair all manner of Windows issues, while also boosting performance, optimizing memory, and keeping your PC running like new. So don't wait any longer - download Fortect today!

Select Enable or Disable from the Range menu drop-down list to enable or disable spanning. Striping allows you to use a disk so you can distribute storage space across multiple RAID configurations.
Enter
see preferred size, configuration in MB, or currently use the default. Click “Accept” if necessary “Continue”.
The motherboard supports Serial ATA hard drives, CD drives, and DVD drives. For better performance, install
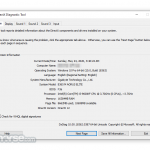
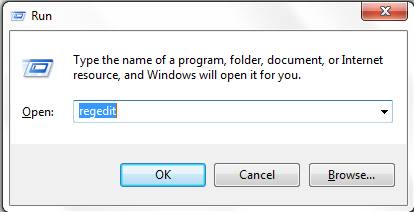
Press Windows logo key + R to open the Run dialog box. Type regedit in the Run dialog box, then press Enter to launch Registry Editor. In the left pane, associated with Registry Editor, click any DirectX subkey under Microsoft Tech to view the content in the right pane.
The same usage results in the same model and the same role when creating a disk array.
Connect the SATA power cable to the power connector on each drive.
You must enable all RAID features in your BIOS settings before creating RAID sets with
Save your current changes and exit the BIOS setup program. Then enter the BIOS setup program again.
Finally, read Chapter 3 to learn more Learn more about navigating BIOS settings.
Due to chipset limitations, more or less all SATA connectors show up when SATA vents are set to RAID mode
I just finished my first gaming PC build and the specific memory management plan was to boot Windows 10 and run the software from my M.2 state (Samsung NVME 970 Evo Plus 250GB M.2-2280 NVME Solid Drive) and set up two other SSDs (Western Digital Blue 500 GB, 2.5 inches) in RAID1.
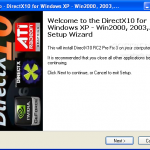
The only thing you need to do is extract the files to a folder.Run DXSETUP. PERFORMING.Follow the instructions and you’re done.
I have installed windows 10 on samsung and intend to use it to keep my startup as startup. Now I’m trying to set up my 2 WB Blues in RAID 1 so I can access them while trying to share my boot drive from storage.
Method 2: uninstall DirectX. Uninstall via apps and functions / programs and functions. Find and click DirectX Happy Uninstall in the list. In the next location, you need to click Delete and you can start deleting.
1. In the uefi BIOS utility (1405), Advanced Mode/Advanced/SATA Configuration, I set the SATA mode to RAID.
Turn on the system in question and press the “Del” key to enter the BIOS [advanced mode].Click [Advanced], and thenClick the [SATA Configuration] item.Click the [SATA Mode] item and set it to [RAID] as shown in red in the figure below 1.Click the [Boot] page and set the [Launch CSM] item to [Disabled].Press the F10 key and press OK, the system may reboot automatically.
2. After rebooting the computer, the RAIDXpert2 setup utility appeared. In a RAIDXpert2 configuration, I program the array management and create the array. Here I created my entire RAID 1 array with implementation properties: RAID 1 level, array status: ready, array capacity: 499.5 GB, etc.
3. AfterTo create a RAID array, I started Windows and saved it.
My problem is I can’t use my specific RAID array as disk storage (e.g. D in disk management I – I don’t see it in disk management. All I see is my Samsung boot drive. Please note that I installed Armory Crate and updated the chipset drivers, Wi-Fi, etc. But when I go to Manager, Device, there are several “RAID Controller” devices that do not have drivers installed. The four RAID controllers are devices located on PCI 7, 8, 14 and even 15 buses.
I downloaded the Armory Crate RAIDXpert2 utility zip file, but I’m not sure if that’s what I need. The RAIDXpert2 directory currently has a lot of different application files (such as “AsusSetup”) and I don’t want to go back and do something I shouldn’t. However, I installed the raidxpert2 utility. When I opened the browser program, our own username/password was ‘admin’, but that didn’t allow me to do ‘submit’. This was mentioned in the Understanding section, but in almost every forum I have found out about how to set up a RAID setup inas a hot shoe or boot disk. This is an illustrative defined process of what I’m about to do, so I’m not sure what steps I need to follow before accessing the RAIDXpert2 utility (if there is one).
Download this software and fix your PC in minutes.Hotkeys for quick access to the RAID configuration are hardly supported when the BIOS is typed for legacy boot mode. It’s only when you can’t manage a certain RAID array in Windows that someone needs to access the RAID layout in the UEFI BIOS.
Go to Help Setup > SATA Drives, set the chipset’s SATA mode to RAID. Go to Advanced > Disk Configuration and set Configure SATA As to RAID. Sometimes go to Advanced > Disk Configuration, set Disk Mode to Advanced, and often set RAID to Enabled.
Jak Odinstalowac Directx 10 Dla Systemu Windows 7
Hur Man Avinstallerar Directx 10 For Windows 7
Windows 7용 Directx 10을 제거하는 방법
Hoe Directx 10 Voor Windows 7 Te Verwijderen
Como Desinstalar O Directx 10 Para Windows 7
Comment Desinstaller Directx 10 Pour Windows 7
So Deinstallieren Sie Directx 10 Fur Windows 7
Come Disinstallare Directx 10 Per Windows 7
Como Desinstalar Directx 10 Para Windows 7
Kak Udalit Direktks 10 Na Vindovs 7